My Sites

Forums


Monday, July 13, 2015
Mellie Beans ~ Medication

Supplies:
Program: Photoshop Elements 13 (other versions may work; PSP X5
Tube of choice: I Hate You by Elias. You must have a license to use his tubes.
PTU Kit: Daisies and Denim by MellieBeans at Mystical Scraps
Open:
Template 53 MedicationTutorial:
Template 53 Medication: delete credits
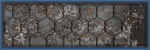
Creme rectangle: pp 14 --> re-size as needed --> select the magic wand tool --> click the rectangle --> ctrl+shift+i --> press delete on the paper layer
Plum rectangle: pp 13 --> re-size as needed --> select the magic wand tool --> click the rectangle --> ctrl+shift+i --> press delete on the paper layer
Purple circle: pp 20 --> rotate 90 deg right --> re-size as needed --> select the magic wand tool --> click the circle--> ctrl+shift+i --> press delete on the paper layer
White oval: filter --> noise --> add noise --> 50%, uniform, monochromatic --> click okay
White circle: filter --> noise --> add noise --> 50%, uniform, monochromatic --> click okay
Raster 2: filter --> noise --> add noise --> 50%, uniform, monochromatic --> click okay
Bottom tan strip: pp 12 --> re-size as needed --> select the magic wand tool --> click the tan strip --> ctrl+shift+i --> press delete on the paper layer
Top purple circle: don't do anything yet
Bottom purple circle: pp 11 --> re-size as needed --> select the magic wand tool --> click the circle --> ctrl+shift+i --> press delete on the paper layer
Top tan strip: pp 3 --> re-size as needed --> select the magic wand tool --> click the tan strip --> ctrl+shift+i --> press delete on the paper layer
Tube: re-size to your liking --> duplicate --> place original layer above the creme oval--> select the magic wand tool --> click the circle --> ctrl+shift+i --> press delete on the tube --> enhance --> autosharpen
Duplicate tube: select the elliptical marquee tool --> select portion of the bottom of your tube --> press delete
Creme oval: pp6 --> re-size as needed --> select the magic wand tool --> click the oval--> ctrl+shift+i --> press delete on the paper layer
Tube: Place closeup of tube above large tan circle --> position to your liking --> change from normal to luminosity
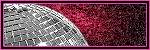
Large tan circle (PSP X5): open color palette --> select the eye dropper tool --> select the yellow --> switch background/foreground --> select the light blue next to the yellow --> select the gradient tool --> set settings to your liking (i used 45 deg repeats 4) --> fill circle with gradient --> select all --> float --> effects --> alien skin 5 textures --> select weave --> apply these settings -- click okay

Eye candy 5 Impact --> glass --> apply these settings --> click okay

Middle plum circle: do the same as for the large tan circle (including the tube)
e34: re-size to your liking --> place above large tan circle --> enhance --> auto sharpen
e23: re-size to your liking --> place behind top tan strip --> enhance --> auto sharpen
e13: re-size to your liking --> place above raster 2 --> enhance --> auto sharpen
e8: re-size to your liking --> place above e13 --> duplicate twice
e8 duplicate 1: crop duplicate so part of it is behind the tube --> enhance --> auto sharpen
e8 duplicate 2: move towards the top of the template behind the tube's head --> enhance --> auto sharpen
e3: re-size to your liking --> place behind e8 --> position so part of e8 is aligned with the white lace of e3--> enhance --> auto sharpen
e15: re-size to your liking --> place above bottom dotted circle --> enhance --> auto sharpen
Name:
-Photoshop Elements13
-Font of choice (mine is Darleston so these settings work for my fonts. you may need to alter slightly for yours)
-layer --> layer style --> style settings
drop shadow: 30 deg angle; 5, 5, 75%; black
stroke: 2, 100, #cda92d
font color: #0d9f41
font color: #0d9f41
Add copyright and watermark
DONE

Subscribe to:
Post Comments
(Atom)
My Blinkies
0 comments:
Post a Comment