My Sites

Forums


Sunday, August 23, 2015
Monti's Scraps ~ Sunflowers

Supplies:
Program: Photoshop Elements 13 (other versions may work)
Tube of choice: Individual Tube 14-1 by Melissa Dawn. You must have a license to use her tubes.
PTU Kit: ScrapMonti_IB-MelissaDawn-14-1 by Monti's Scraps at Creative Design Outlet
Plugins: Eye Candy 5
Font: Sunflower
Open:
Paper7
Frame1
Element1
Element5
Element17
Element21
Element26
WordArt
Tube of choice
Tutorial:
Frame 1: Open
Paper7: Paste behind frame1 --> use rectanglular marquee tool --> draw a square --> ctrl+shift+i --> select the paper --> press delete
Element26: Open --> re-size 45% --> place on the left side of the frame --> duplicate --> move to the right side
Element1: Open --> re-size25% --> duplicate 4x --> place each copy in the 4 corners of the frame --> place the 2 at the bottom in front of element26
Element21: Open --> re-size 50% --> place on the left side of the frame behind element26 --> duplicate --> move to the right side
Element5: Open --> re-size 50% --> place behind frame in slightly off center
Element 17: Open --> re-size 50% --> place behind element5 to the left
Word Art: Open --> re-size 57% --> place on the top above the two sunflowers
Name:
-Photoshop Elements13
-Font of choice (mine is Sunflower so these settings work for my font. you may need to alter slightly for yours)
-layer --> layer style --> style settings
drop shadow: 30 deg angle; 6, 6, 75%; black
stroke: 2, 100, #5a2717
font color: #edb118
font color: #edb118
Add copyright and watermark
DONE

Monday, July 13, 2015
Mellie Beans ~ Medication
Supplies:
Program: Photoshop Elements 13 (other versions may work; PSP X5
Tube of choice: I Hate You by Elias. You must have a license to use his tubes.
PTU Kit: Daisies and Denim by MellieBeans at Mystical Scraps
Open:
Template 53 MedicationTutorial:
Template 53 Medication: delete credits
Creme rectangle: pp 14 --> re-size as needed --> select the magic wand tool --> click the rectangle --> ctrl+shift+i --> press delete on the paper layer
Plum rectangle: pp 13 --> re-size as needed --> select the magic wand tool --> click the rectangle --> ctrl+shift+i --> press delete on the paper layer
Purple circle: pp 20 --> rotate 90 deg right --> re-size as needed --> select the magic wand tool --> click the circle--> ctrl+shift+i --> press delete on the paper layer
White oval: filter --> noise --> add noise --> 50%, uniform, monochromatic --> click okay
White circle: filter --> noise --> add noise --> 50%, uniform, monochromatic --> click okay
Raster 2: filter --> noise --> add noise --> 50%, uniform, monochromatic --> click okay
Bottom tan strip: pp 12 --> re-size as needed --> select the magic wand tool --> click the tan strip --> ctrl+shift+i --> press delete on the paper layer
Top purple circle: don't do anything yet
Bottom purple circle: pp 11 --> re-size as needed --> select the magic wand tool --> click the circle --> ctrl+shift+i --> press delete on the paper layer
Top tan strip: pp 3 --> re-size as needed --> select the magic wand tool --> click the tan strip --> ctrl+shift+i --> press delete on the paper layer
Tube: re-size to your liking --> duplicate --> place original layer above the creme oval--> select the magic wand tool --> click the circle --> ctrl+shift+i --> press delete on the tube --> enhance --> autosharpen
Duplicate tube: select the elliptical marquee tool --> select portion of the bottom of your tube --> press delete
Creme oval: pp6 --> re-size as needed --> select the magic wand tool --> click the oval--> ctrl+shift+i --> press delete on the paper layer
Tube: Place closeup of tube above large tan circle --> position to your liking --> change from normal to luminosity
Large tan circle (PSP X5): open color palette --> select the eye dropper tool --> select the yellow --> switch background/foreground --> select the light blue next to the yellow --> select the gradient tool --> set settings to your liking (i used 45 deg repeats 4) --> fill circle with gradient --> select all --> float --> effects --> alien skin 5 textures --> select weave --> apply these settings -- click okay

Eye candy 5 Impact --> glass --> apply these settings --> click okay

Middle plum circle: do the same as for the large tan circle (including the tube)
e34: re-size to your liking --> place above large tan circle --> enhance --> auto sharpen
e23: re-size to your liking --> place behind top tan strip --> enhance --> auto sharpen
e13: re-size to your liking --> place above raster 2 --> enhance --> auto sharpen
e8: re-size to your liking --> place above e13 --> duplicate twice
e8 duplicate 1: crop duplicate so part of it is behind the tube --> enhance --> auto sharpen
e8 duplicate 2: move towards the top of the template behind the tube's head --> enhance --> auto sharpen
e3: re-size to your liking --> place behind e8 --> position so part of e8 is aligned with the white lace of e3--> enhance --> auto sharpen
e15: re-size to your liking --> place above bottom dotted circle --> enhance --> auto sharpen
Name:
-Photoshop Elements13
-Font of choice (mine is Darleston so these settings work for my fonts. you may need to alter slightly for yours)
-layer --> layer style --> style settings
drop shadow: 30 deg angle; 5, 5, 75%; black
stroke: 2, 100, #cda92d
font color: #0d9f41
font color: #0d9f41
Add copyright and watermark
DONE
Monday, June 29, 2015
Monti's Scraps ~ Naughty Housewife
Supplies:
Program: Photoshop Elements 9 (other versions may work) and PSP X5
Tube of choice: Housewife by Tony Tzanoukakis. You must have a license to use his tubes.
PTU Kit: Clean As A Whistle by Monti's Scraps
Open:
Paper 2
Dryer
FabricSoftner
FloorCleaner
LaundryBasketFull
Mop
Towels-Yellow
Paper 2
Dryer
FabricSoftner
FloorCleaner
LaundryBasketFull
Mop
Towels-Yellow
Washer
Window
Bucket
ClothesLine
WashingPowder
WindowCleaner
Tutorial:
New image --> 596 x 650 --> transparent
Paper 2: open --> paste--> apply mask
Dryer: re-size by 42% place towards the left --> enhance --> autosharpen --> add drop shadow
Washer: re-size by 42% place on the right side of the dyer --> enhance --> autosharpen --> add drop shadow
LaundryBasketFull: re-size by 36% --> place on right side in front of washer --> enhance --> autosharpen --> add drop shadow
Bucket: re-size 20% --> move to right side of the dryer --> enhance --> autosharpen --> add drop shadow
FloorCleaner: re-size 19% --> move to the left & behind the bucket --> enhance --> autosharpen --> add drop shadow
Mop: rotate about 20 degrees to the left --> re-size 45% --> move to the far right of the dryer by the edge --> enhance --> autosharpen --> add drop shadow
Tube: place in the center of the washer and dryer --> add drop shadow
WindowCleaner: re-size 20% --> place on top of the dryer on the left side --> enhance --> autosharpen --> add drop shadow
FabricSoftner: re-size 20% --> place on top of the dryer --> position behind the windowcleaner --> enhance --> autosharpen --> add drop shadow
Towels-Yellow: re-size 21% --> place on top of the washer to the left side --> enhance --> autosharpen --> add drop shadow
WashingPowder: re-size 18% --> place on top of the washer --> position to the right behind towels-yellow --> enhance --> autosharpen --> add drop shadow
Window: re-size 85% --> place behind washer & dryer --> position in the center --> enhance --> autosharpen --> add drop shadow
ClothesLine: re-size 47% --> place behind window --> position in the center --> enhance --> autosharpen --> add drop shadow
Name:
-Photoshop Elements 9
-Font of choice (mine is Darleston so these settings work for my fonts. you may need to alter slightly for yours)
-layer --> layer style --> style settings
drop shadow: 0 deg angle; 4, 4, 75%; black
stroke: 2, 100, #fdd75b (yellow)
Add copyright and watermark
DONE
Friday, May 8, 2015
Mellie Beans ~ Mardi Gras
Supplies:
Program: Photoshop Elements 9 (other versions may work)
Tube of choice: Mask by VeryMany. You must have a license to use her tubes.
PTU Kit: Mardi Gras by MellieBeans at Heartbeatz Creationz or MusicalScraps
Font: Great Vibes
Open:
e35Tutorial:
e35: re-save in a different location and file name to avoid saving over the original frame
pp09: re-size to fit inside e35 (the frame)
e04: re-size 85% --> place above the e35 layer in the center --> use selection tool around the edges to delete any excess --> add drop shadow
e02: re-size 93% --> move to the right side above e04 layer --> duplicate --> move to the left --> merge two layers --> use selection tool around the edges to delete any excess --> add drop shadow
e27: rotate 112 deg left --> re-size 95% --> place above the e04 layer --> move to the center
tube of choice: re-size to your choice --> place in the center --> duplicate --> crop top layer so it looks like the head is over the frame and behind e02 --> crop bottom layer so there's no excess below the frame
Name:
-Photoshop Elements 9
-Font of choice (mine is Great Vibes so these settings work for my fonts. you may need to alter slightly for yours)
-layer --> layer style --> style settings
drop shadow: 30 deg angle; 5, 5, 75%; black
stroke: 2, 100, #cda92d
font color: #0d9f41
font color: #0d9f41
Add copyright and watermark
DONE
Thursday, May 7, 2015
Monti's Scraps ~ Coffee Addict

Supplies:
Program: Photoshop Elements 9 (other versions may work) and PSP X5
Tube of choice: Girl With Coffee by VeryMany. You must have a license to use her tubes.
PTU Kit: Coffee Addict by Monti's Scraps
Font: Great Vibes; Grad
Template: Template_96_Coffee from Dangerously Delicious Designz
Mask: Mask of choice
Template: Template_96_Coffee from Dangerously Delicious Designz
Mask: Mask of choice
Open:
Template 96
Template 96
Cafeteria
Clock-Purple
CoffeeBeans-CupFill
CoffeeBeans-Scattered
CreamJug-Brown
CupAndSaucer-Purple
IcedCoffee
Mug-Green
Mug-Green
SugarBowl-Cream
Teaspoon1
Paper 2
Paper 6
Paper 7
Paper 9
Paper 10
Paper 12
Paper 13
Paper 15
Tutorial:
Paper 2
Paper 6
Paper 7
Paper 9
Paper 10
Paper 12
Paper 13
Paper 15
Tutorial:
Template 96: delete info, wording, wording white with d/s, pink frames, black frames, white frames bgs, right and left pink squares, and right and left white squares
Paper 13: open --> paste over left white triangle on template--> re-size paper --> magic wand tool --> select --> ctrl+shift+I --> delete
Paper 9: open --> paste over blue white triangle --> re-size paper --> magic wand
tool --> select --> ctrl+shift+I --> delete
Paper 12: open --> paste over blue strip --> re-size paper --> magic wand
tool --> select --> ctrl+shift+I --> delete
Paper 7: open --> paste over right white triangle --> re-size paper --> magic wand
tool --> select --> ctrl+shift+I --> delete
Paper 6: open --> paste over right blue triangle --> re-size paper --> magic wand
tool --> select --> ctrl+shift+I --> delete
Paper 2: open --> paste over blue circle --> re-size paper --> magic wand
tool --> select --> ctrl+shift+I --> delete
Paper 10: open --> paste over black rectangle --> re-size paper --> magic wand
tool --> select --> ctrl+shift+I --> delete
Paper 15: open --> paste behind all template layers --> place mask
CoffeeBeans-Scattered: re-size 89% --> place above the layers of the template in the center
CoffeeBeans-CupFill: re-size 85% --> place above CoffeeBeans-Scattered layer --> move towards bottom portion of the scattered beans --> duplicate x7 --> hide 5 of the duplicate layers
1st duplicate: rotate 20 deg to the right --> place above the first cupfill and to the left slightly
2nd: rotate 20 deg to the right --> place above 1st duplicate and to the left more
3rd: rotate 17 deg to the left --> place above 2nd duplicate and to the right
4th: move to the upper left above the CoffeeBeans-Scattered layer
5th: move directly above the 2nd
6th: move above the 5th and down some
7th: move above the CoffeeBeans-Scattered to the upper right
Clock-Purple: re-size 50% --> place above the CoffeeBeans-Scattered and CoffeeBeans-CupFill plus the duplicates --> move to the left side in front of the left white triangle
Mug-Green: flip horizontal --> re-size 38% --> place above the Clock-Purple layer to the left --> using a font of your choice (similar to mine) type Coffee Addict separately --> add your style settings as you wish for your text
IcedCoffee: re-size 42% --> place above the blue strip layer --> move to the right and center
Cafeteria: re-size 33% -> place above the IcedCoffee element --> move to the right
CreamJug-Brown: re-size 52% --> place above the Cafeteria element --> move to the left while slightly overlapping the two
Tube of choice: re-size to your liking --> place in the center
SugarBowl-Cream: re-size 50% --> place above the Mug-Green element --> move towards the bottom of the mug
CupAndSaucer-Purple: re-size 30% --> place above the SugarBowl-Cream element --> move to the right
Teaspoon1: rotate --> flip horizontal --> re-size 50% --> place above all layers --> move between the SugarBowl-Cream element and the CupAndSaucer-Purple element
Add drop shadow to your liking (I used PSP X5)
Name:
-Photoshop Elements 9
-Font of choice (mine is Great Vibes so these settings work for my fonts. you may need to alter slightly for yours)
-layer --> layer style --> style settings
drop shadow: 30 deg angle; 4, 4, 75%; black
stroke: 2, 100, black
Add copyright and watermark
DONE
Wednesday, January 28, 2015
Rissa's Designs ~ Oceana
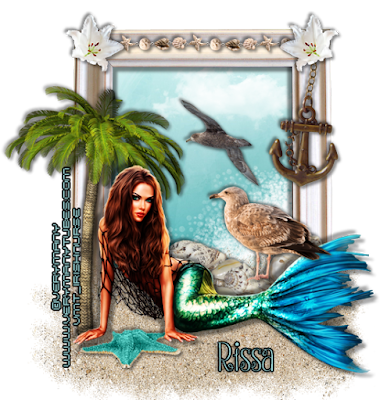
This tutorial is of my own creation and any resemblance, or likeness, to any other tut is purely coincidental. This tutorial is for personal use only; any use for monetary gain is illegal.
Supplies:
Program: Photoshop Elements 9 (other versions may work)
Tube of choice: Mermaid by VeryMany. You must have a license to use her tubes.
PTU Kit: Oceana by Rissa's Designs
Font: Strawberry Whipped Cream
Open:
RD_O_Paper14
RD_O_element32
RD_O_element6
RD_O_element10
RD_O_element11
RD_O_element36
RD_O_element41
RD_O_element46
RD_O_element52
RD_O_element59
RD_O_element73
RD_O_element77
RD_O_element78
Tutorial:
Create a new canvas ~ 521 x 549
RD_O_Paper14
RD_O_element32
RD_O_element6
RD_O_element10
RD_O_element11
RD_O_element36
RD_O_element41
RD_O_element46
RD_O_element52
RD_O_element59
RD_O_element73
RD_O_element77
RD_O_element78
Tutorial:
Create a new canvas ~ 521 x 549
RD_O_element32: paste onto new canvas
RD_O_Paper14: place behind frame and re-size to inside frame and crop if need be
RD_O_element77: re-size to 176 x 211 and crop out any that sticks past the frame --> place to the lower left inside the frame
RD_O_element52: re-size to206 x 99 --> place upper center of the tag
RD_O_element11: re-size to 120 x 130 --> place in center of the sky slightly overlapping element 52 (clouds)
RD_O_element77: re-size to 306 x 36 --> place on upper portion of the frame in the center
RD_O_element46: re-size to 476 x 144 --> duplicate x2 --> move all 3 layers where you want them (mine are above the frame and below the tube to make it look like she's laying on the sand some)
RD_O_element73: re-size to 152 x 68 --> place on bottom left of canvas
RD_O_element10: re-size 110 x 225 --> place on right side of frame (like a charm on a phone)
RD_O_element36: re-size to 93 x 92 --> place in the right upper corner of frame above the seashells over element10 (anchor) --> duplicate --> mirror --> place on the left corner of the frame
Tube of choice: re-size to your liking --> place in front of frame towards the bottom --> duplicate --> overlay on the duplicate layer
RD_O_element59: re-size 323 x 146 --> place behind tube --> make sure it's sticking out some
RD_O_element41: image --> rotate --> flip horizontal (or mirror) --> re-size 260 x 359 --> place on left side of frame behind the tube
RD_O_element6: re-size 181 x 143 --> place above tube on top of the seashells
Add your tube of choice
Add drop shadow to your liking (I used PSP X5)
Name:
-Photoshop Elements 9
-Font of choice (mine is Strawberry Whipped Cream so these settings work for my font. you may need to alter slightly for yours)
-layer --> layer style --> style settings
drop shadow: 30 deg angle; 5, 5, 75%; black
stroke: 2, 100, black
Add copyright and watermark
DONE
Tuesday, January 27, 2015
Mellie Beans ~ Definitely Girlie, Definitely

Supplies:
Program: Photoshop Elements 9 (other versions may work)
Tube of choice: Margaret by VeryMany. You must have a license to use her tubes.
PTU Kit: Definitely Girlie, Definitely by MellieBeans at Heartbeatz Creationz or Mystical Scraps
Open:
fr01
pp01
cluster01
e02
e34
e36
e37
e38
e40
e42
e48
e49
Tutorial:
Create a new canvas ~ 650 (w) x 488 (h)
fr01
pp01
cluster01
e02
e34
e36
e37
e38
e40
e42
e48
e49
Tutorial:
Create a new canvas ~ 650 (w) x 488 (h)
fr01: re-size 249 (w) x 246 (h) --> move to upper left --> duplicate --> move diagonally down to the right
pp01: magic wand tool --> select inside both frames --> select--> modify --> expand --> 5 pixels --> ctrl. + shift + I --> select the paper --> delete
tube of choice: mirror --> place above paper & behind frame --> select inside the frame on the left --> modify --> expand --> 5 pixels --> ctrl. + shift + I --> select the tube --> delete --> repeat for the other tube in the 2nd frame
e36: place behind frames and paper to the left
e40: re-size 156 (w) x 225 (h) --> place on the left frame to the left middle of the two frames
e02: re-size 97 (w) x 84 (h) --> place towards the bottom of e40 (feather)
e37: rotate --> custom --> 135 right --> re-size 139 (w) x 184 (h) --> place on right side of the right frame in the middle of the curve
e49: re-size 282 (w) x 215 (h) --> place on the top part of the right frame
e48: rotate --> custom --> 30 right --> re-size 311 (w) x 258 (h) --> place at the bottom of the right frame near e37
cluster01: rotate --> 90 deg left --> re-size 205 (w) x 307 (h) --> place to the bottom left of the left frame near e48
e38: re-size 114 (w) x 110 (h) --> place above the e48 layer and directly on top of the circle with secret written on it --> duplicate --> hide duplicate layer for now
tube of choice: re-size to your liking --> place on the right side of the tag --> filter --> xero --> radiance (use settings below or adjust to the way you want it)
e34: re-size 97 (w) x 94 (h) --> paste below the frames & to the right of the feather
e38: unhide duplicate layer --> move below the frames, above e34, & to the right some
e42: rotate --> custom --> 30 left --> re-size 189 (w) x 188 (h) --> place behind tube on upper back --> crop what you need for it too look like your tube has wings
Add drop shadow to your liking (I used PSP X5)
Name:
-Photoshop Elements 9
-Font of choice (mine is Freebooter Script so these settings work for my font. you may need to alter slightly for yours)
-layer --> layer style --> style settings
drop shadow: 30 deg angle; 3, 3, 75%; black
stroke: 3, 100, black
Add copyright and watermark
DONE
Subscribe to:
Posts
(Atom)
My Blinkies